Hosting WordPress Sites on GitHub Pages
WordPress, still one of the most popular content management systems (CMS) around, faces its share of challenges, especially when it comes to maintenance and security. The more plugins you use, the more complex it gets to keep everything running smoothly.
Combining WordPress with the Staatic plugin offers an ideal resolution, combining WordPress’ user-friendliness and rich features with the streamlined efficiency of a static site. When integrated with GitHub Pages, this approach not only simplifies website management but also ensures robust security and enhanced speed, all while benefiting from the complimentary hosting services of GitHub’s robust platform.
What is GitHub and GitHub Pages?
GitHub is a platform primarily used for code hosting and version control, allowing multiple people to work on a project simultaneously. GitHub Pages is a feature of GitHub that allows users to host their website directly from a GitHub repository. It’s particularly well-suited for static sites, making it an excellent choice for WordPress users looking to enhance performance and security.
Being a part of GitHub, it naturally integrates with Git, providing version control for your website. This means you can track changes, revert to previous versions, and manage your site with the same tools you use for your code.
Getting started with GitHub Pages
To host your WordPress site on GitHub Pages, start by creating an account at GitHub.com. Once your account is set up, create a public repository named myusername.github.io (replace myusername with your GitHub username). This repository will host your WordPress site. Optionally initialize it with a README.md file to describe your site.
Creating a personal access token
A personal access token on GitHub serves as a secure alternative to a password, offering programmatic access to your GitHub account. This token is a crucial element for linking your WordPress site to GitHub, as it enables the Staatic plugin to connect seamlessly to your GitHub repository.
To create a personal access token:
- Log in to your GitHub account and go to your settings.
- In the settings menu, navigate to Developer settings, then select Personal access tokens and then Fine-grained tokens.
- Click on Generate new token. This step is important for granting the Staatic plugin the necessary permissions to interact with your GitHub repository.
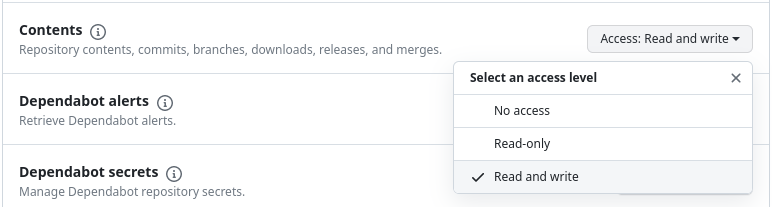
- Assign a descriptive name to your token for easy identification. Then, assign the token to the relevant repository. Ensure you grant Read and write permissions under the Contents section in Repository access. Note that this action also automatically sets the Metadata permission to read-only.

- Once you’ve selected the necessary permissions, generate the token. Remember to copy and securely store this token immediately, as it won’t be visible again.
Later, when configuring the Staatic plugin in your WordPress setup, this token will be entered to authenticate and link the plugin with your GitHub repository, enabling the automatic update and deployment of your static WordPress site.
Setting up Staatic
To host your WordPress site on GitHub Pages, it must first be converted into a static format. This is where the Staatic plugin for WordPress comes into play. It simplifies the process of transforming your dynamic WordPress site into a static one, a necessary step for compatibility with GitHub Pages.
Installing Staatic for WordPress
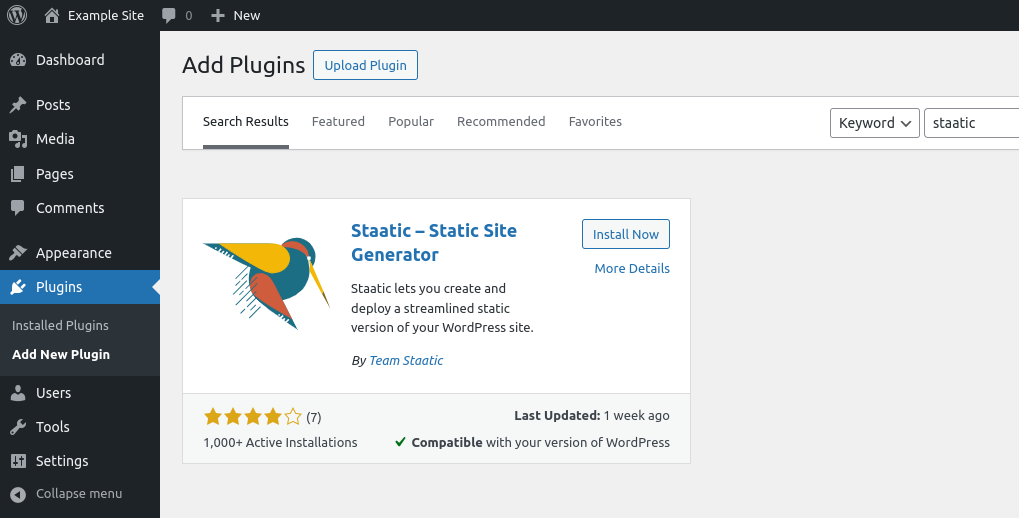
- Access your WordPress Admin panel and go to the ‘Plugins’ area.
- Click Add New located at the top of the page.
- Enter ‘Staatic’ in the search field and hit Enter to search for the plugin.
- Find the Staatic plugin in the search results and select Install Now to initiate the installation process.
- Once the installation finishes, click Activate to start using Staatic on your WordPress website.
Configuring the plugin
- Navigating to Staatic settings: From your WordPress dashboard, select Staatic > Settings.
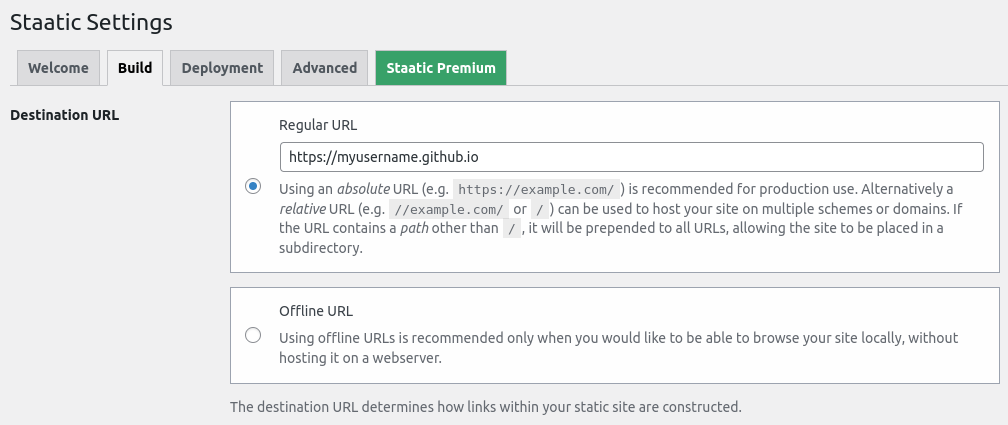
- Configuring Build settings:
- Go to the Build tab.
- In Destination URL, enter
/for a relative URL orhttps://myusername.github.iofor absolute. For the latter, make sure to replacemyusernamewith your GitHub username). - Click Save Changes.

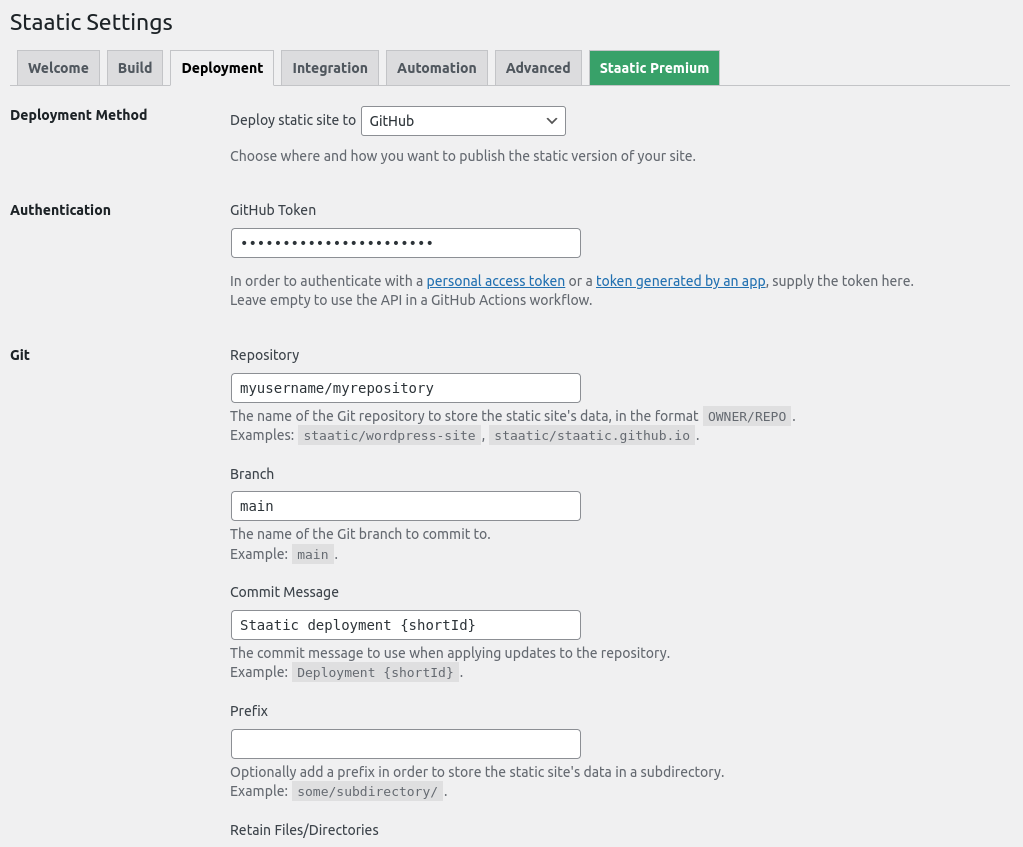
- Configuring Deployment settings:
- Move to the Deployment tab.
- Select GitHub in the deployment method dropdown.
- Under Repository enter the name of your GitHub repository in the format
OWNER/REPO, for examplemyusername/myrepository. - Add
README.mdto Retain Files/Directories to keep it intact during deployments. - Click Save Changes.

Publishing your site
The final phase involves generating and deploying the static version of your WordPress site.
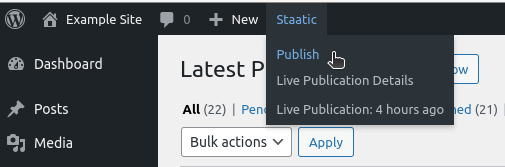
- Initiating the publishing process: Go to your WordPress admin area and click on Staatic > Publish found in the admin toolbar at the top of the page.

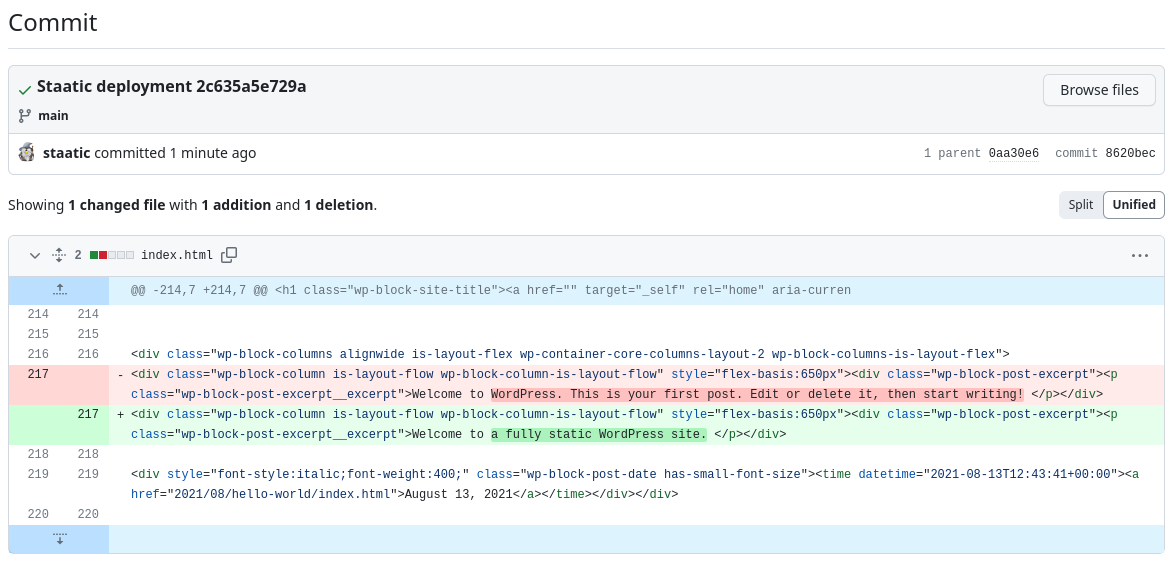
- Monitoring the publishing progress: This step transforms your dynamic WordPress site into a static format. Wait for the static version of the site to be committed to your GitHub repository.
Once your site is committed to GitHub, go to https://github.com/USERNAME/USERNAME.github.io/actions to view the deployment progress. Look for the pages-build-deployment workflow. When it’s complete, your static WordPress site will be live at https://myusername.github.io.
Making changes to your site
Updating your WordPress site to reflect the latest changes is a straightforward process. Start by making the desired modifications to your site through the regular WordPress interface, whether it’s adding new content, updating existing posts, or altering the site’s design and layout. After you’ve made your changes, simply initiate the update process.
To do this, navigate to the top admin toolbar in your WordPress dashboard and select the Staatic > Publish option again. Once this conversion is complete, Staatic automatically commits these changes to your linked GitHub repository, triggering the GitHub Action to deploy the updated site to GitHub Pages.
Linking a custom DNS domain to your GitHub Pages site
Enhancing the professional appearance and brand identity of your GitHub Pages site can be effectively achieved by linking a custom DNS domain. This upgrade not only solidifies your brand presence but also improves memorability and credibility with your audience. GitHub offers comprehensive support for various domain configurations, including apex domains (like example.com), www subdomains (such as www.example.com), and other custom subdomains (e.g., blog.example.com). This flexibility allows for a wide range of customization options to suit your specific branding needs.
The process involves purchasing a domain (or using an existing domain), adding it to your GitHub repository, verifying the domain, and updating DNS records. While the specific steps require careful attention to detail, they are straightforward and are well-documented in the GitHub documentation.
It’s important to note that DNS changes might take up to 48 hours to propagate, so patience and careful verification using tools like dig or nslookup are key. For detailed instructions and troubleshooting, refer to GitHub’s official documentation.
Note: If you previously set an absolute Destination URL in the Staatic plugin, remember to update this URL. Afterwards, redeploy your site by navigating to Staatic > Publish in your dashboard.