Hosting WordPress sites on IPFS using Fleek
IPFS (InterPlanetary File System) brings a fresh perspective to web hosting, offering a decentralized approach that focuses on improved security and efficiency. In this tutorial, we’ll explore how to host your WordPress site using IPFS, with the help of Fleek.
Understanding IPFS and its advantages

IPFS, short for InterPlanetary File System, is an innovative protocol that transforms the traditional web hosting model. It shifts away from the centralized approach of storing files on a single server, embracing a more distributed method of data handling.
Unlike traditional methods, IPFS doesn’t rely on a single server or location for data storage. It is a peer-to-peer protocol where data is stored across a vast network of computers, known as nodes. This network is global, meaning your data can be stored in multiple places all over the world.
When you use IPFS to access a file, it retrieves the data from the nearest node. This means faster access and reduced load times, as the information doesn’t have to travel far. This decentralized approach not only speeds up the internet but also makes it more resilient. With data spread out, the risk of losing information due to a single server failure is greatly reduced.
Benefits of IPFS
- Decentralization: By distributing data across a global network of nodes, IPFS significantly reduces the risk of server downtime. This decentralized structure enhances overall security, making it harder for cyber attacks to impact the entire network.
- Efficiency: IPFS optimizes content delivery by retrieving data from the closest node available. This proximity-based approach ensures quicker access and faster loading times, improving the user experience, especially in areas with slower internet connections.
- Durability: One of the key strengths of IPFS is its ability to maintain content availability. As long as the data is hosted on any node within the network, it remains accessible, providing a layer of durability that traditional single-server systems can’t match. This feature is particularly beneficial for preserving important data and preventing loss due to localized failures.
How Fleek makes IPFS accessible
Fleek stands out as a pivotal platform in this digital shift towards decentralized web hosting. It acts as a bridge, connecting users to the innovative capabilities of IPFS with remarkable ease.
Designed for both technical and non-technical users, Fleek simplifies the process of deploying and managing websites on the IPFS network. This service streamlines the complexities typically associated with decentralized hosting, providing a user-friendly interface and tools that make the transition smooth and efficient.
With Fleek, users can harness the full potential of IPFS, ensuring their websites are more resilient, faster, and aligned with the principles of a decentralized internet.
Creating a static version of your WordPress site
Transitioning your WordPress site into a version compatible with IPFS hosting begins with the installation of the Staatic plugin. This plugin is designed to convert dynamic WordPress sites into static websites, making them ideal for IPFS hosting.
Installing Staatic
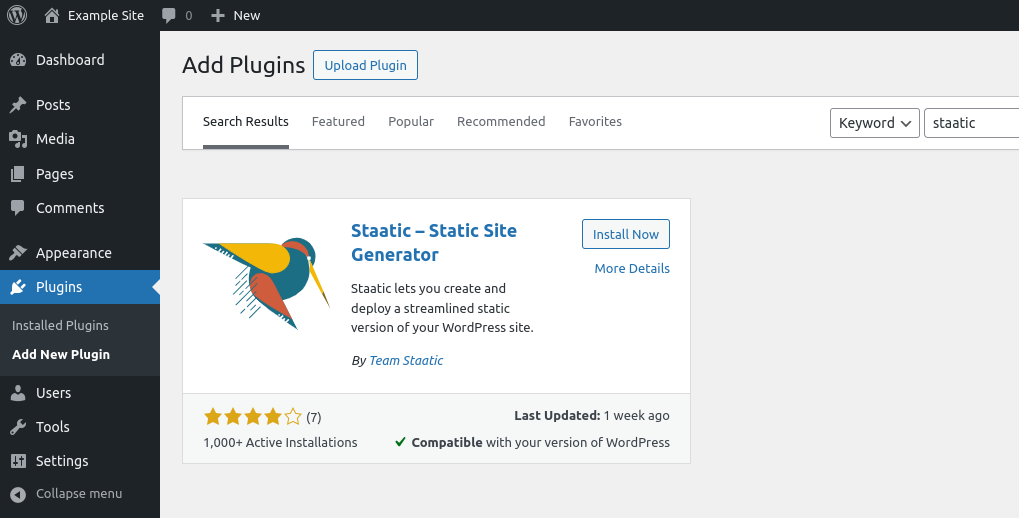
- Log in to your WordPress Admin dashboard and navigate to the ‘Plugins’ section.
- At the top of the page, click on ‘Add New Plugin’.
- In the search bar, type ‘Staatic’ and press Enter to find the plugin.
- Once you locate the Staatic plugin in the search results, click on ‘Install Now’ to begin the installation.
- After the installation is complete, click ‘Activate’ to enable Staatic on your WordPress site.
Configuring Staatic
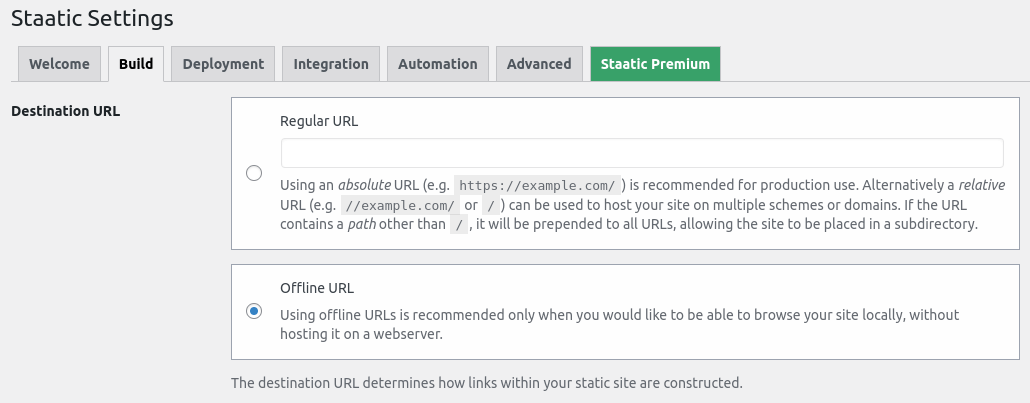
After activating Staatic, configure it for IPFS compatibility by using ‘Offline URLs’. This setup ensures your site’s links work correctly across various access points in the IPFS network, regardless of the node or gateway used.
- Accessing Staatic settings: In your WordPress dashboard, go to Staatic > Settings.
- Setting up the build configuration:
- Navigate to the Build tab.
- Under ‘Destination URL’, select Offline URL. This setting is vital as it prepares your site to operate independently of the server, crucial for IPFS hosting.

- Deployment method configuration:
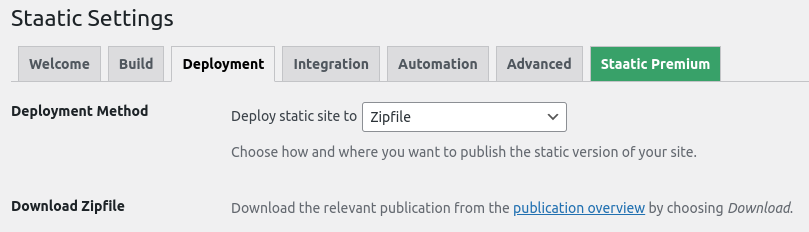
- Switch to the Deployment tab.
- Choose Zipfile from the deployment options. This method packages your entire site into a single zipfile, simplifying the transfer to IPFS.

Publishing your static site
After configuring the settings, the next step is to create the static version of your WordPress site.
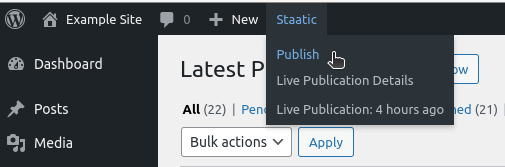
- Starting the publication process: From your WordPress admin panel, select Staatic > Publish located in the admin toolbar at the top.

- Monitoring the publication: The publication process converts your dynamic WordPress site into a static format. Monitor the progress and wait for the process to complete.
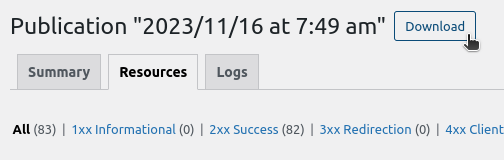
- Downloading the static site:
- Once the publication is finished, from the publication details page click the Resources tab.
- Finally click the Download button at the top of the page. This action downloads the zipfile containing your static website.

By following these steps, you’ll have successfully converted your WordPress site into a static format, ready for hosting on the IPFS network.
Setting up Fleek
With your static site in a zipfile, it’s time to set up Fleek.
Creating a Fleek account and setting up Fleek CLI
To utilize Fleek, you need to create an account on their platform and set up the Fleek Command Line Interface (CLI). The CLI is a powerful tool that allows you to interact with Fleek’s services directly from your command line.
Installing the Fleek CLI
- Open your command line interface.
- Run the installation command: Type
npm install -g @fleekhq/fleek-cliand press Enter. This command installs the Fleek CLI using npm, a package manager for JavaScript.
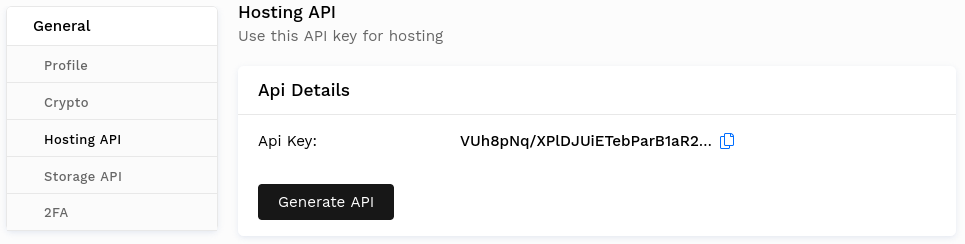
Retrieving and using an API key
To utilize the Fleek CLI, first generate an API key through the Fleek user interface. Navigate to your profile at the bottom left, select ‘Settings’, and under ‘Hosting API’, click ‘Generate API’. Copy the generated key.
Then, add an environment variable named FLEEK_API_KEY to your system and assign the copied key as its value, e.g. by executing export FLEEK_API_KEY="YOUR_FLEEK_API_KEY".
With this step completed, the Fleek CLI is ready for use.
Linking your local site directory to Fleek
After installing and configuring the Fleek CLI, you can link your local static site directory to Fleek.
- Unzip the static site: Locate the zipfile you downloaded from Staatic and extract it into a chosen directory on your computer. This directory will contain the static version of your WordPress site.
- Initializing your site with Fleek CLI:
- Open a terminal or command line interface of your operating system.
- Use the
cdcommand to navigate to the directory where your static site is extracted. - In the command line, type
fleek site:initand press Enter to begin the initialization with Fleek. - Follow the on-screen instructions provided by the Fleek CLI to link your local site directory to your Fleek account.
$ fleek site:init
'This command will walk you through initializing a new or existing fleek site config in the current directory.'

'Successfully initializing a site would create a .fleek.json file in your directory.'
'You can then use `fleek site:deploy` to deploy changes made to your publish directory.'

? Which team you wanna use? Please input the teamId. 045b3f37-b4a4-468a-8776-1b2d3c24c92c
...fetching list of sites for team: 045b3f37-b4a4-468a-8776-1b2d3c24c92c
? Which site you wanna use? Create new site
? Select the public directory for deployment ('.' for current directory): .
publishing files in ~/Projects/ipfs-example-site to IPFS
packaging site contents...
uploading...
Site cid is QmUm1f19D6B5D5a5p96rQVd4yHMkotm9A4krwhKtMAhDrB
creating new site
Fleek site grown-salad-0242 was successfully initialized.
After the initialization process is complete, the local static site directory will contain a .fleek.json file. This file holds important information such as the site’s unique identifier and various configuration details.
Deploying updates of your site
To update your site hosted on IPFS, begin with the Staatic plugin on your dynamic WordPress site. Start by creating a new publication. This step generates an updated zipfile reflecting the latest changes to your site.
Once the new zipfile is ready, download it. Replace the existing files in your local static site directory with the contents of this zipfile. This ensures your local version mirrors the most recent updates.
Finally, deploy the updated site to IPFS. Open your command line interface and run fleek site:deploy. This command uploads the new version to the IPFS network via Fleek. After the deployment completes, Fleek will provide an updated link to your site, now hosting the latest content on the IPFS network.
$ fleek site:deploy
publishing files in ~/Projects/ipfs-example-site to IPFS
packaging site contents...
uploading...
Site cid is QmUm1f19D6B5D5a5p96rQVd4yHMkotm9A4krwhKtMAhDrB
New deployment has been triggered.
View deployment here: https://app.fleek.co/#/sites/grown-salad-0242/deploys/2023-11-16T12:22:47.464Z?accountId=045b3f37-b4a4-468a-8776-1b2d3c24c92c
Adding a custom domain to your site
While your site is accessible via a default Fleek subdomain like your-site-name.on.fleek.co, integrating a custom domain can enhance its identity and accessibility. Custom domains allow your site to be reached through distinct, non-Fleek URLs.
Steps to add a custom domain:
- Access your site’s settings: Navigate to your site’s dashboard on Fleek and look for the ‘Add or Register Domain’ option in the domain management section.
- Enter your domain: Input the domain name you wish to link to your site. Ensure this domain is either already under your ownership or available for registration.
- Verification and configuration:
- If you own the domain, Fleek will prompt you to verify your ownership, typically involving adding DNS records to your domain’s DNS settings.
- If the domain is available for registration, Fleek will guide you through acquiring and setting it up.
For detailed instructions, consult Fleek’s guide on custom DNS domains: Fleek Domain Management. This resource provides extensive details on domain management, DNS configurations, and troubleshooting.
Final thoughts on your WordPress site hosted on IPFS
With your WordPress site now hosted on IPFS, you’re at the forefront of embracing a decentralized web. Hosting your site on IPFS is just the beginning. The IPFS ecosystem is constantly evolving, offering new opportunities to enhance your site’s capabilities.
- Engage with the IPFS community: Connect with other IPFS users. Share experiences, seek advice, and collaborate on projects. The IPFS community is a great resource for support and inspiration.
- Keep up with IPFS developments: Stay informed about new IPFS features and updates. Implementing these advancements can keep your site at the cutting edge of decentralized web technology.
- Explore decentralized applications (dApps): Consider integrating dApps with your site. dApps can offer unique functionalities and enhance user engagement.
- Utilize advanced IPFS features: Investigate deeper into IPFS’s features like content pinning or IPNS for dynamic content. These can add more robustness and flexibility to your site.
- Spread the word: As an IPFS adopter, your experiences can enlighten others about the benefits of decentralized web hosting. Share your journey to encourage broader adoption.