Optimizing WP-Cron performance using cron or Task Scheduler
Introduction to WP-Cron
WP-Cron is an important component of WordPress which is responsible for the processing of scheduled tasks within WordPress core as well as plugins. The name originates from the cron time-based task scheduler available on UNIX systems.
What makes WP-Cron special is the fact that it works well on a broad range of environments including those with limited resources or limited access. Different from regular cron implementations, it checks on every page load a list of scheduled tasks and triggers any tasks due to run on the spot.
While WP-Cron improves compatibility with different environments enormously, it does come with some major drawbacks:
- When there is little or no traffic on your site, tasks due to run are not executing.
- Tasks that take longer than the maximum execution time (usually 30 or 60 seconds) fail in the middle of their execution.
The first drawback is specifically a problem for static sites where the dynamic WordPress installation is separate from the public facing static site, and as such doesn’t receive much or any traffic.
Optimizing WP-Cron
Luckily there are ways to integrate WP-Cron with the regular cron task scheduler or Windows Task Scheduler circumventing these limitations.
The easiest and also traditional way to achieve this is by setting up a task in the system’s task scheduler to call the wp-cron.php file using a web request. This however does not solve the maximum execution time issue mentioned earlier, and adds challenges when your dynamic WordPress site is protected with HTTP basic authentication, which is recommended when hosting static WordPress sites with Staatic.
Therefore we recommend utilizing WP-CLI, a command-line interface for WordPress that provides a wp cron command allowing us to execute scheduled tasks due.
WP-CLI is included by many hosting providers as a standard feature, especially those that are specialized in WordPress hosting. Alternatively WP-CLI can be installed manually by following these instructions.
MacOS and Linux
Both MacOS and Linux use cron as their time based scheduling system. When you have command-line access to the server this is usually configured using the crontab -e command. Most hosts also provide a hosting control panel that allows you to set up cron tasks using a web-based interface. Consult your hosting provider’s documentation for detailed steps to configure cron tasks.
Cron tasks require a specific syntax:
<schedule> <task></task></schedule>Where <schedule></schedule> consists of the following time and date fields and <task></task> is the command to execute.
| Field | Allowed values |
|---|---|
| Minute | 0-59 |
| Hour | 0-23 |
| Day of month | 1-31 |
| Month | 1-12 |
| Day of week | 0-7 |
Step values are also permitted after an asterisk, so if specifying a task to be run every five minutes, you can use */5 for the Minute field.
Note: unless explicitly configured, tasks run by cron are executed under the same context of the user setting up the task.
The simplest way to execute the tasks due is to use run the following command:
wp cron event run --due-now --path="/path/to/site"As a cron task running every minute, this would result in:
*/1 * * * * wp cron event run --due-now --path="/path/to/site"Windows
Windows provides the Windows Task Scheduler to schedule time-based tasks. The steps to configure tasks depends on your specific Windows version as well your WordPress webserver configuration.
The following assumes that you are running Windows 11 with the Xampp server.
-
Open Task Scheduler by opening the Start menu and typing “Task Scheduler”, and then click Task Scheduler.

-
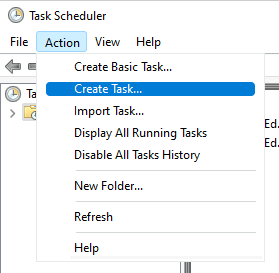
Open the Create Task Wizard by opening the Action menu and clicking Create Task.

-
Give the task a Name, for example “WP-Cron”.
-
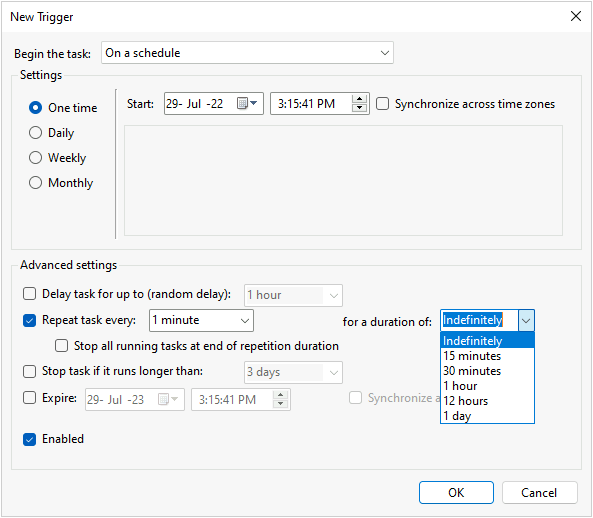
Add a trigger by clicking the Trigger tab and clicking New…. In Advanced Settings check Repeat task every and type 1 minute. Select Indefinitely in the for a duration of option. Then click OK to save the trigger.

-
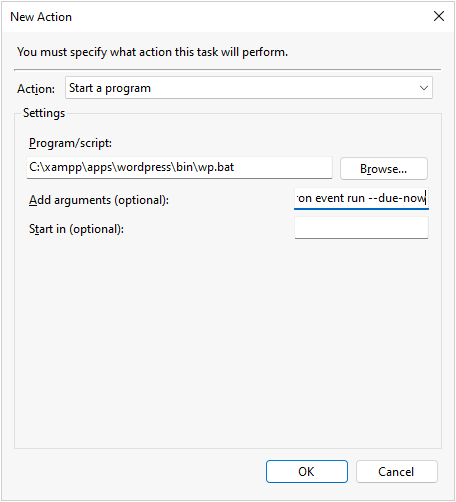
Add an action by clicking the Actions tab and clicking New…. Then Browse for the WP-CLI binary (e.g.
C:\xampp\apps\wordpress\bin\wp.bat) and in Add arguments typecron event run --due-now. Then click OK to save the action.
-
Finally click OK to create the task.
Disable WP-Cron on page load
Once the task has been scheduled using your system’s task scheduler, WordPress needs to be instructed to no longer run WP-Cron on each page load. It is no longer necessary and contributes to additional load on your server.
In order to disable WP-Cron on page load, add the following line to the wp-config.php file:
define('DISABLE_WP_CRON', true);Ensure everything is working
WordPress includes a task that, by default, runs every hour. Conveniently, if a task is more than an hour late, this will be reported as a failure on the Site Health Screen. If there are no failures reported an hour after setting up WP-CLI cron, you can be sure that everything is working properly.