Introduction
Cloudinary offers various image and video optimization, transformation and delivery solutions that make it possible to optimize the performance of your static site even further. They provide a WordPress plugin that directly integrates with the existing WordPress media library allowing existing and new media to automatically be optimized and synchronized with their platform. They also add an improved gallery widget to the block editor.
In order to use the Cloudinary plugin for WordPress you will first need to create a Cloudinary account. They offer a Free forever plan which includes 25 monthly credits, equal to, for example, 25,000 transformations, 25GB of storage, or 25GB of bandwidth, when this guide was written in August 2022. See their pricing page for the current plans.
Note: when creating an account be sure to select the Programmable Media product during registration, since other products are not compatible with their Cloudinary plugin.
Setting up the Cloudinary plugin
After installing and activating the Cloudinary plugin from the WordPress directory, you will need to connect your Cloudinary account. This requires you to enter your Connection string, which can be found in the Cloudinary Dashboard. Access the dashboard by logging in and clicking Dashboard from the top menu bar. Then copy the API Environment variable and remove the CLOUDINARY_URL= prefix. Paste this value into the connection string input field and click Next.
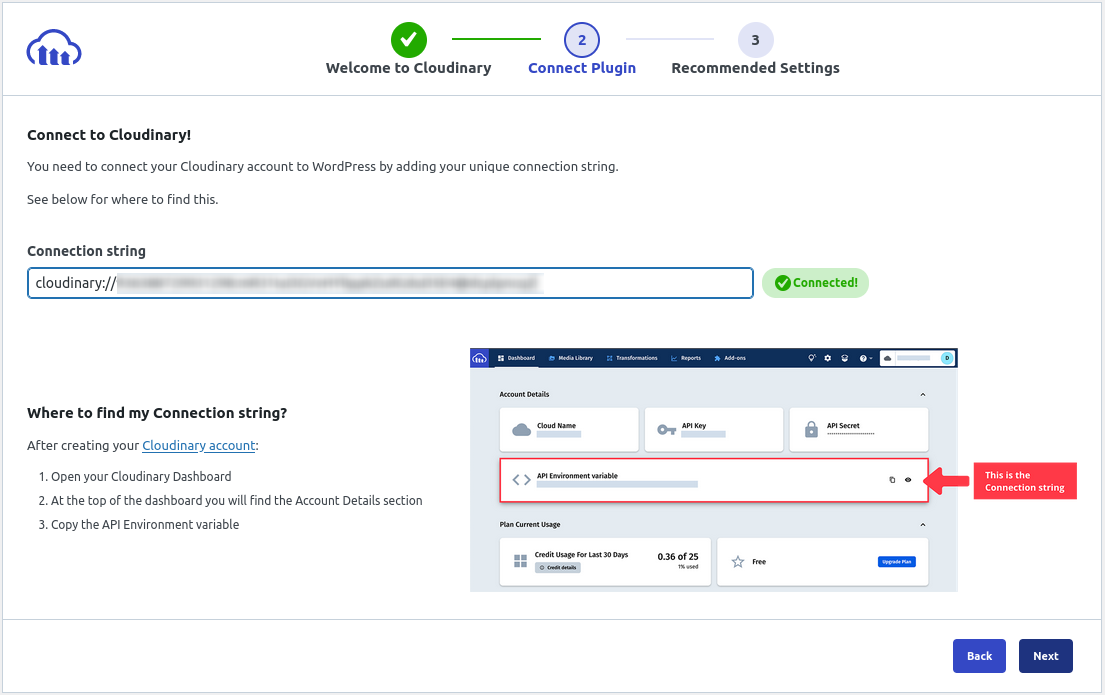
Then accept the default optimization options, or click the lock icon to customize them, and click Next.

Now you should be able to access the Cloudinary dashboard within WordPress as well as various settings pages to further tune its features.
Existing media should also start uploading to Cloudinary automatically. You can verify by going to your WordPress Media Library and changing the view from Grid to List.
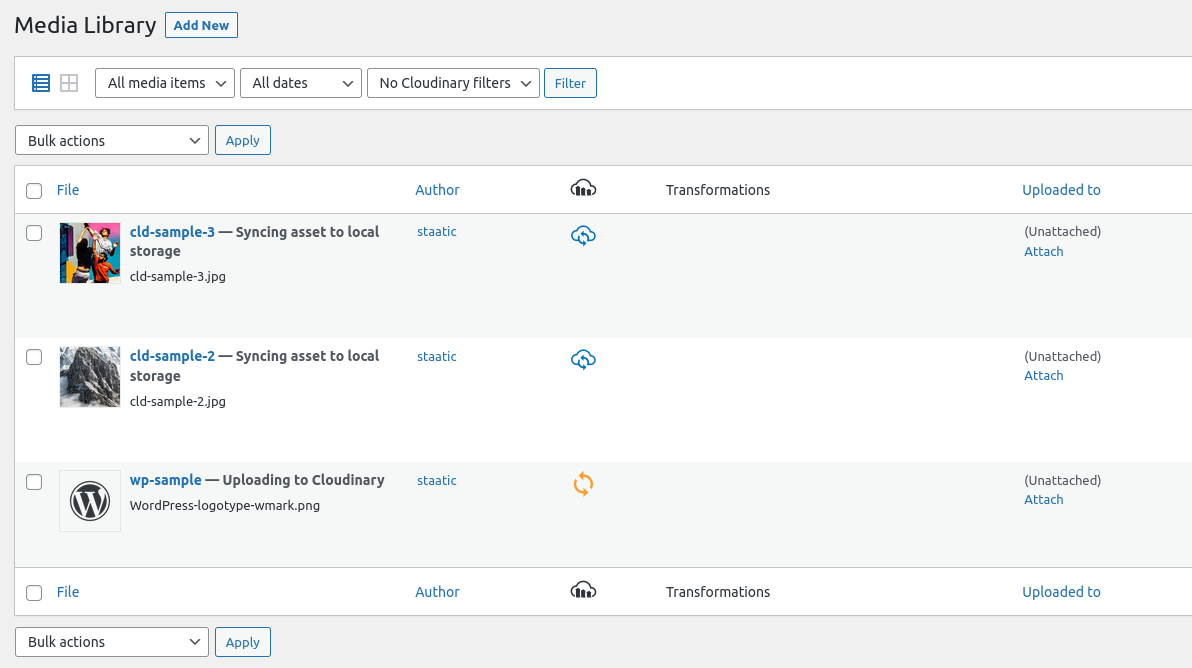
Note: when hosting your static site on Staatic Cloud, we recommend the option Deliver from WordPress instead of Sync and deliver from Cloudinary, since your site and media will already be distributed globally in order to achieve the best possible performance.
To compress the images in your media library instead of delivering them from Cloudinary, see the guides for EWWW Image Optimizer and Smush.
For more information about the Cloudinary plugin for WordPress, have a look at their full documentation.