Netlify
Introduction
The Netlify deployment method uploads the generated static site directly to an existing Netlify site.
Use this method when Netlify is responsible for serving the static site and you want Staatic to publish directly to the Netlify deploy API.
This deployment method supports:
- Deployment to a Netlify site;
- Support for HTTP redirects;
- Support for generated
Content-Typeheader rules where needed; - Support for custom error page through generated Netlify configuration.
Preparation
In order to use this deployment method, you need to create an account and site on https://netlify.com/.
Make sure that URL asset optimization is disabled for your site. You can find this setting within the Netlify App at Site settings > Build & deploy > Post processing > Asset optimization > URLs.
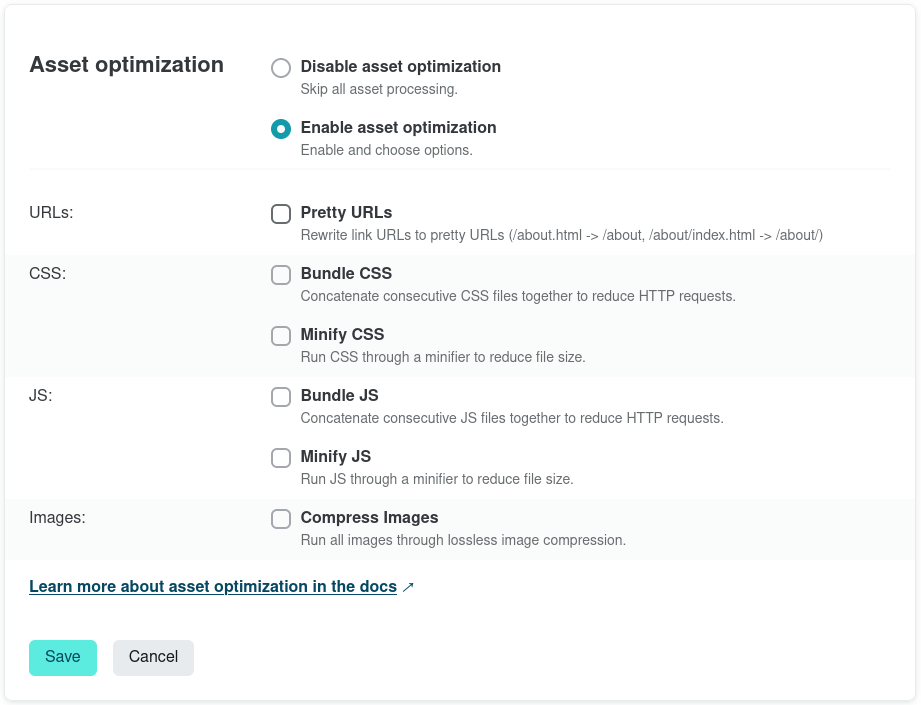
Note: make sure that Disable asset optimization itself is not checked, as we encountered cases where disabling URLs within asset optimization would not work otherwise.
Configuration
In order to configure the Netlify deployment method, head over to the WordPress Admin and click Staatic > Settings > Deployment. Choose Netlify as the deployment method and make sure the following fields are entered correctly.
Netlify Access Token
Your Netlify Personal Access Token, which you can find or create within the Netlify App at User Settings > Applications > Personal access tokens.
Staatic stores this token encrypted. The connection check validates the token against the Netlify API.
Netlify Site ID
Your Netlify Site API ID, which you can find within the Netlify App at Site Settings > Site Details > API ID.
When both the access token and site ID are configured, the connection check validates access to that specific site.
How Deployment Works
Staatic creates a Netlify deploy with a file manifest, uploads the files Netlify reports as required, and then waits for Netlify to finish processing the deploy. Finalization can take longer than the upload step because Staatic polls Netlify until the deploy leaves its pending states.
Staatic also generates a netlify.toml file for the deployment. This file represents Staatic redirects, the generated 404 page, and selected headers that Netlify needs in order to serve the static output correctly.
| Generated config | Behavior |
|---|---|
| Redirects | Generated for Staatic results that redirect to another URL. |
| 404 handling | Generated as a Netlify redirect rule to the transformed not-found path. |
| Headers | Generated where Staatic needs to preserve non-standard MIME types or non-UTF-8 character sets. |
Developers can extend or filter the generated Netlify configuration with Staatic hooks, but most sites should not need custom code for the default redirect and 404 behavior.