Forms Integration
- Introduction
- Requirements
- How forms integration works
- Enabling form handling
- Managing forms
- Managing form submissions
- Using webhooks and Zapier
- Limitations and caveats
Note: This functionality is part of Staatic Premium Edition and requires an active subscription. Connect your Staatic account before enabling form handling.
Introduction
Staatic Forms provides a dynamic backend for forms on a static site. During publication, Staatic prepares supported forms so visitors submit directly to Staatic’s form endpoint instead of posting back to WordPress.
Use Forms Integration when your static site still needs contact forms, lead forms, or other simple form submissions after WordPress has been published statically.
Supported use cases include:
- simple HTML forms;
- nested fields using
[]notation; - file attachments;
- forms rendered by supported WordPress form plugins.
Server-side or plugin-managed multi-page form workflows are not supported. A client-side step interface can work if it renders one final static HTML form and submits all required fields in a single request to Staatic Forms.
Requirements
Forms Integration depends on Premium account state and a connected Staatic account.
| Requirement | Why it matters |
|---|---|
| Staatic Premium Edition | The integration module is Premium-only. |
| Active subscription | Integration hooks are only enabled for active subscriptions. |
| Connected Staatic account | Staatic needs account access to create forms, sync notifications and configure the submission endpoint during publication. |
How forms integration works
Forms Integration has a publication-time part and a runtime part.
| Phase | Behavior |
|---|---|
| WordPress render | Supported plugin integrations add Staatic metadata to the form markup. |
| Static publication | Staatic finds forms marked with data-staatic, creates or looks up the form in Staatic and rewrites the form action to the Staatic endpoint. |
| Visitor submission | The static form posts to Staatic Forms. WordPress is not involved in the submission request. |
| Backend processing | Staatic stores the submission, validates spam controls and processes configured notifications after verification. |
Submissions are stored in Staatic’s backend, not as local WordPress posts. The WordPress admin views under Staatic > Forms read and update that API-backed data.
Enabling form handling
In order to receive form submissions, forms need to be integrated with Staatic Forms. This can be done automatically for supported plugins, or manually when you control the form markup.
Automatic integration
Automatic form integration is available for the following WordPress form plugins:
To enable automatic integration, head over to the WordPress Admin and click Staatic > Settings > Integration. Make sure Enable forms integration with popular WordPress plugins is checked.
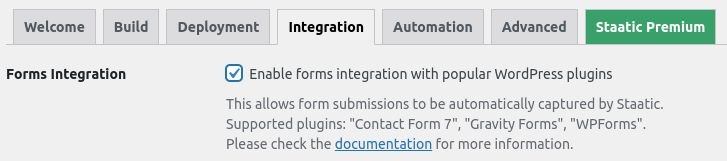
Automatically integrated forms receive Staatic form metadata and a honeypot field. For supported plugins, Staatic also disables frontend AJAX assumptions where needed so the static form can submit directly to Staatic Forms.
Ninja Forms is not supported because it relies on AJAX behavior that cannot be handled as a static HTML form submission.
Contact Form 7 integration
In order for Staatic to uniquely identify forms, make sure the shortcode includes the form ID. If a title is present, Staatic uses it; otherwise Staatic looks up the Contact Form 7 title by ID.
[contact-form-7 id="123" title="My Contact Form"]The form title is used to identify the form in the Staatic customer portal and in notifications.
Manual integration
In case you cannot use automatic integration, or when you need full control over the available form handling options, you can manually integrate your forms with Staatic Forms.
Within the HTML code of the form, make sure the <form> tag has a name attribute with the name of the form, as well as the data-staatic attribute with any value, for example:
<form data-staatic="true" name="Contact Form">
    <input name="name" placeholder="Your name" type="text">
    <input name="email" placeholder="Your email address" type="email">
    <input type="submit" value="Submit">
</form>
The following additional <form> attributes are available:
Redirect URL (data-staatic-redirect-url)
By default when a form is submitted, a thank-you page is shown. To redirect users to your site, use the data-staatic-redirect-url attribute with the URL to redirect as a value.
Example:
<form data-staatic="true" data-staatic-redirect-url="https://example.com/thank-you/" name="Contact Form">
    ...
</form>
For a newly discovered form, this creates the form in Staatic with redirect behavior. If the form already exists, adjust the response type and redirect URL under Staatic > Forms > Details.
Honeypot (data-staatic-honeypot)
To reduce the amount of spam, add a hidden field to the page containing the form and use the data-staatic-honeypot attribute with the value of the hidden field.
Example:
<form data-staatic="true" data-staatic-honeypot="honeypot_123" name="Contact Form">
    ...
    <input name="honeypot_123" style="display: none;" type="text" tabindex="-1" autocomplete="off">
</form>
Manual forms must include the honeypot field themselves. The data-staatic-honeypot attribute tells Staatic which submitted field should remain empty.
Note: hide honeypot fields in a way that remains accessible and does not invite real visitors to fill them. Simple inline
display: noneexamples are easy to understand but may be easier for bots to detect.
Setting up notifications
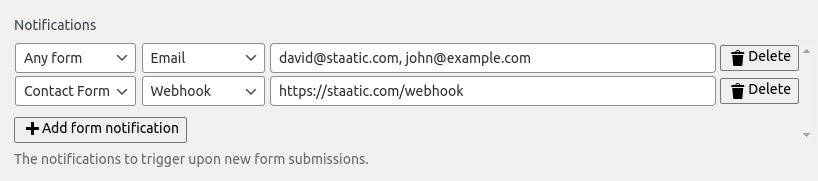
In order to get notified of new form submissions, you can set up one or more notification settings.
Note: Notification settings are available after your Staatic account credentials are configured.
- Go to the WordPress Admin and click Staatic > Settings > Integration.
- Click Add form notification.
- Select the Form that this notification setting applies to, or select Any form to apply it to all forms.
- Choose the Notification type, which can be Email, Autoresponse or Webhook.
- Configure the fields for the selected notification type.
- Click Save Changes.
| Notification type | Required configuration | Behavior |
|---|---|---|
| One or more comma-separated recipients. | Sends a notification email to the configured recipients. | |
| Autoresponse | Autoresponse template. | Sends an email to the submitter when an email address is available in the submission. |
| Webhook | Valid webhook URL. | Posts submission data to the configured URL. |
Notifications are processed only for verified submissions. Check form submissions occasionally to review spam and failed expectations.
Managing forms
Forms identified by Staatic can be managed in the WordPress Admin by going to Staatic > Forms.
Viewing & modifying identified forms
Within the Forms section of Staatic you will see a list of all forms identified and managed by Staatic. When hovering over the name of the form, click Details to view the details of the form.
When viewing the form Details, you will be able to adjust some of the form’s properties, including:
| Property | Purpose |
|---|---|
| Name | The form name used for identification and notifications. |
| Response Type | Either show the Staatic thank-you page or redirect to a configured URL. |
| Honeypot field | The submitted field that should remain empty. |
| reCAPTCHA secret | Secret used to validate g-recaptcha-response for forms with reCAPTCHA enabled. |
If you change a manually integrated form’s redirect behavior after it has already been discovered, update the form details here rather than relying on publication to update the existing form in Staatic.
Managing form submissions
Form submissions handled by Staatic can be managed in the WordPress Admin by going to Staatic > Forms. When hovering over the name of the form, click Submissions to view the submissions of the form.
Here you can view verified submissions and submissions identified as spam. Submission details include submitted fields, request metadata such as referrer information, and file-like values as downloadable links where available.
Submission statuses are:
| Status | Meaning |
|---|---|
| New | Submission has been received and is waiting for validation. |
| Verified | Submission passed validation and can trigger notifications. |
| Spam | Submission was rejected by honeypot, reCAPTCHA, Akismet or another spam check. |
You can mark submissions as spam or verified from the submissions table. This is useful when reviewing borderline submissions or correcting a spam classification.
Uploaded files are supported. Staatic’s backend accepts files up to 20 MiB per uploaded file, but browser, network, and Staatic edge/API limits may still affect whether an upload succeeds.
Using webhooks and Zapier
Staatic Forms supports webhook notifications. Use webhooks when you want to forward verified submissions to another system, including automation platforms such as Zapier.
To use Zapier, create a Zap with a webhook trigger, copy the generated webhook URL, and add it as a Webhook notification for the relevant form or for Any form.
Webhook notifications send submission data after the submission has been verified. Your receiving endpoint should handle repeated or failed delivery attempts safely so downstream records are not duplicated.
Limitations and caveats
Forms Integration is designed for static-friendly forms. Keep these boundaries in mind:
- Forms must render as HTML forms during publication. Staatic transforms non-empty
text/htmlresults. - Forms without a
nameattribute are skipped by the manual transformer. data-staatic-redirect-urlmust contain a valid redirect URL. Invalid redirect URLs prevent that form from being processed.- Manual honeypot configuration does not create the input field. Add the field yourself and keep it empty for real users.
- The public form endpoint is intentionally reachable by visitors. Use honeypot and reCAPTCHA where appropriate, and review spam submissions periodically.
- Submitted file variables are available as attachments and links, but file values are not inserted into email template variables.
- Form submission retention is handled by Staatic according to the account retention policy.